Products
Solutions
Resources
9977 N 90th Street, Suite 250 Scottsdale, AZ 85258 | 1-800-637-7496
© 2024 InEight, Inc. All Rights Reserved | Privacy Statement | Terms of Service | Cookie Policy | Do not sell/share my information

The first step in utilizing the Work Packaging module is to set up your work package structure.
The following steps walk you through creating a construction work package.
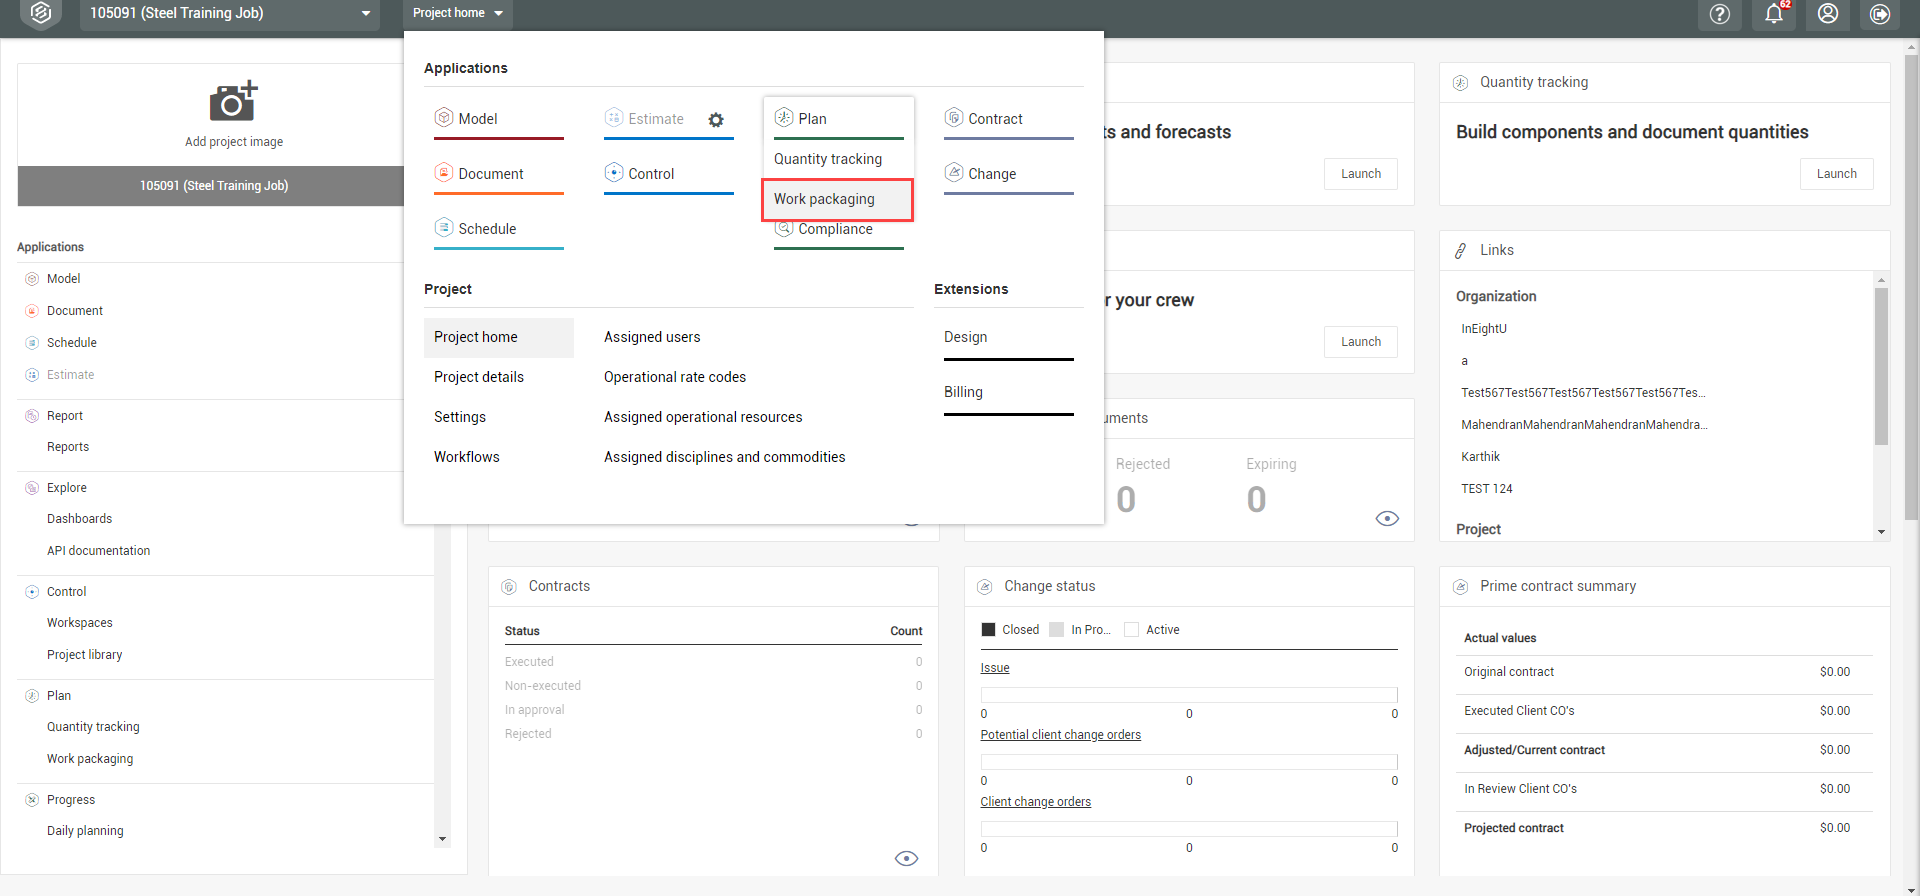
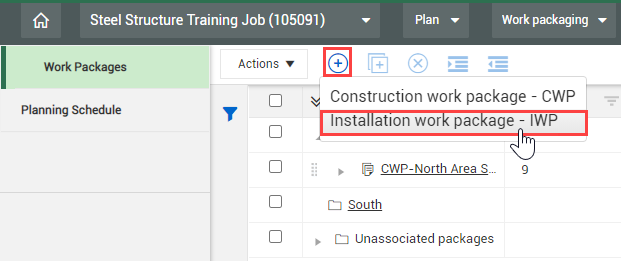
From your project's home page, navigate to the Work packaging module.
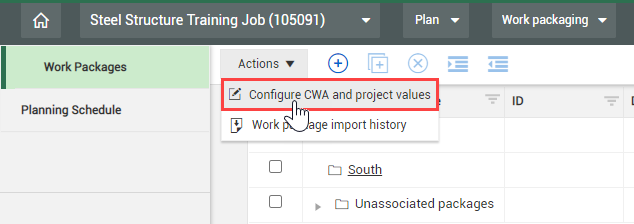
Click on the Action menu and select Configure CWA and project values from the drop-down list.
Construction work packages and installation work packages can also be created within the construction work areas, for example the North construction work area, by clicking on the North construction work area folder then select the add button.
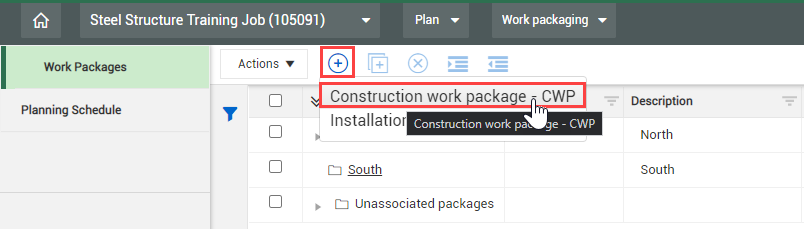
In the new dialog box, name your CWP. Work package names can be 100 characters in length.

Note that the CWP name automatically begins with “CWP-“ by default. You can erase it.
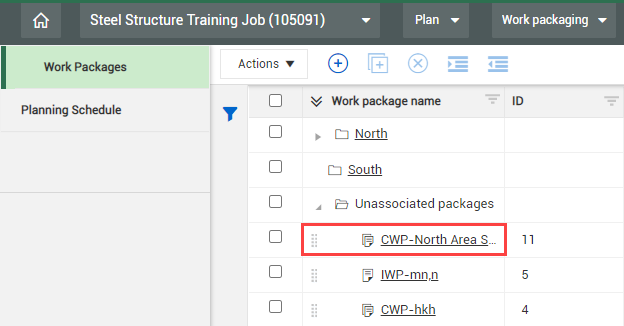
Your created CWP will be located in the Unassociated packages folder by default when you create them outside of a construction work area folder.
After creating the work package, you might need to go in and edit the details. This includes:
Schedule start and finish dates
Planning start and end dates
CWP Description
CWA description and ID
Plan Status
Other fields
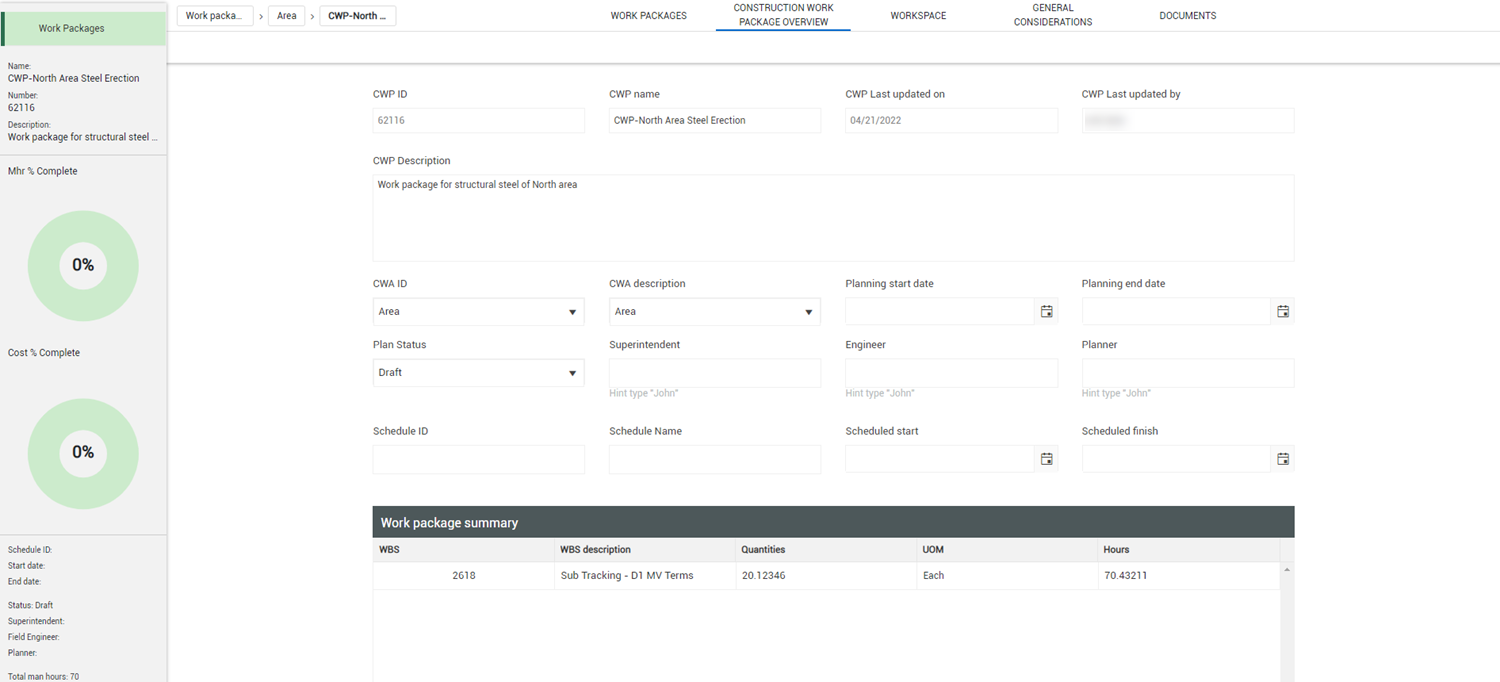
From the Work plans/packages page, select the hyperlink ID on your newly created package.
Select the Construction Work Package Overview tab.
Under CWP description, enter a description.
In Scheduled start date, select a date.
In Scheduled end date, select a later date.
Select a Superintendent.
The Engineer, Superintendent, and Planner fields are validated fields and will bring up a list of people from which to select, once you enter a character.
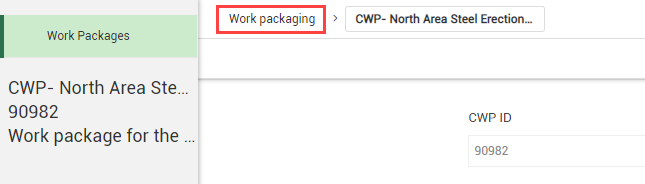
Now that you have all the CWP overview details, you can go back to the Work plans/packages page by selecting Work packaging in the breadcrumbs.
You might need to create the exact same work package for a new area with only a few small changes. Instead of repeating the entire process of creating a new work package, your best choice would be to create a work plan from an already existing one, making the few small changes as necessary.
On the Work plans/packages page, select your previously created work plan, then select the Copy icon.
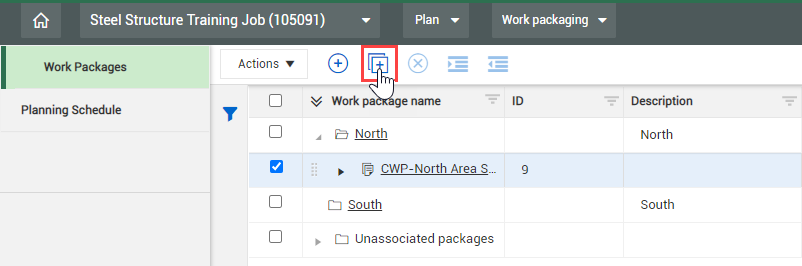
You can copy as many as ten work packages in the same project at the same time.
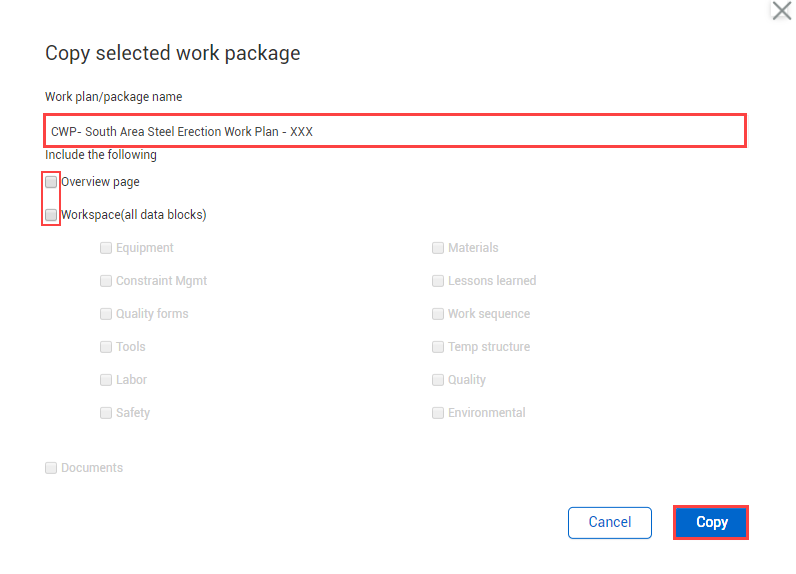
This brings up a new dialog box for you to select what information to carry over
Rename the work plan.
Uncheck Overview page and Workspace (all data blocks).
Continuing with the scenario above, you will create an installation work package.
Within each installation work package, you can assign the labor, components, equipment, materials, and other aspects you need to complete the work.
From your project's home page, navigate to the Work packaging module.
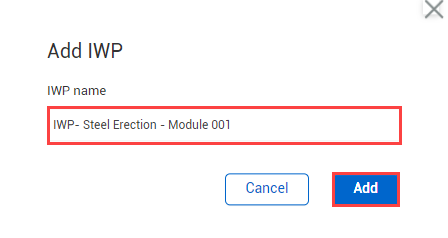
In the Add IWP dialog box, name your work package, and then click Add. Work package names can be 100 characters in length.
An engineering work package lets you link engineering schedules created in InEight Design to a CWP, so you can quickly see the schedule without exiting Plan. You can add an EWP from the Work Packages overview page. This option is enabled only when Plan is integrated with Design.
To add an EWP, select the Add icon in the Work packaging menu, and then select Engineering work package-EWP.
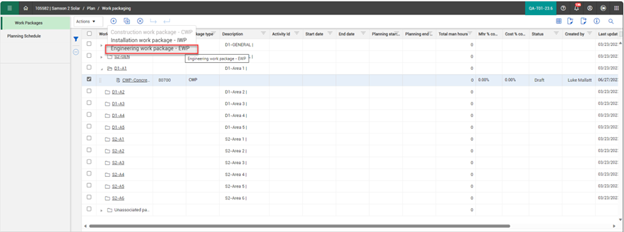
The Add EWPs from project search dialog box opens, and you can select one or more available EWPs to associate with a construction work package (CWP).
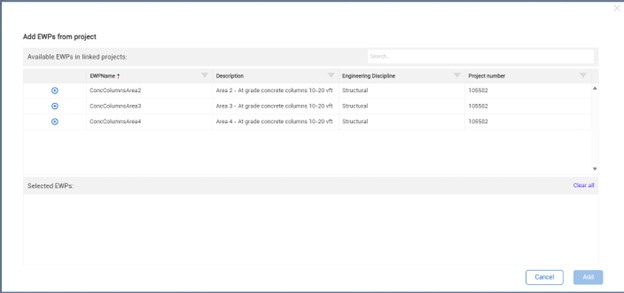
After they are added, the linked Engineering work package (EWP) shows in the associated work package.
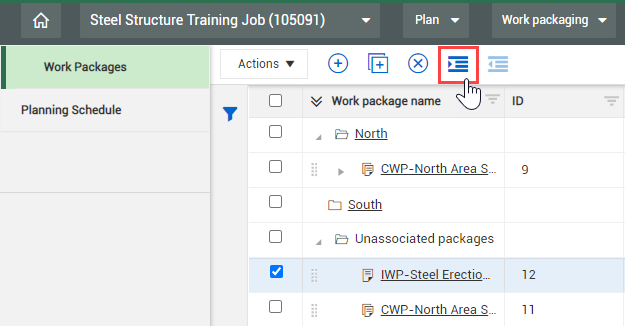
After creating work packages, you can group them under the plans you have created. This helps with the organization and planning of the work.
On the Work plans/packages page, select a work package.
Notice that CWPs and IWPs have different icons.![]()
Click the Move into CWP icon.
You can also group installation work packages into construction work packages by clicking anywhere in the row for the installation work package and dragging it over top of the desired construction work package.
In the Move into CWP dialog box, start typing the name of your construction work package.
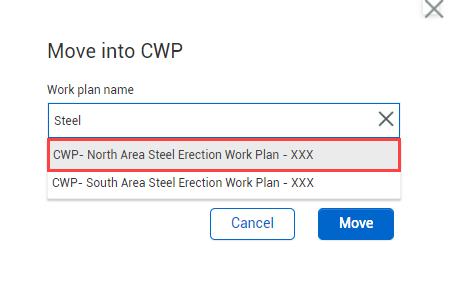
Select the CWP you want to move it to, then click Move to move the package to finish grouping your packages.
You can also group construction work packages into construction work areas by editing the CWP in the Construction Work Package Overview tab, then selecting the appropriate CWA ID or CWA Description from the drop-down.
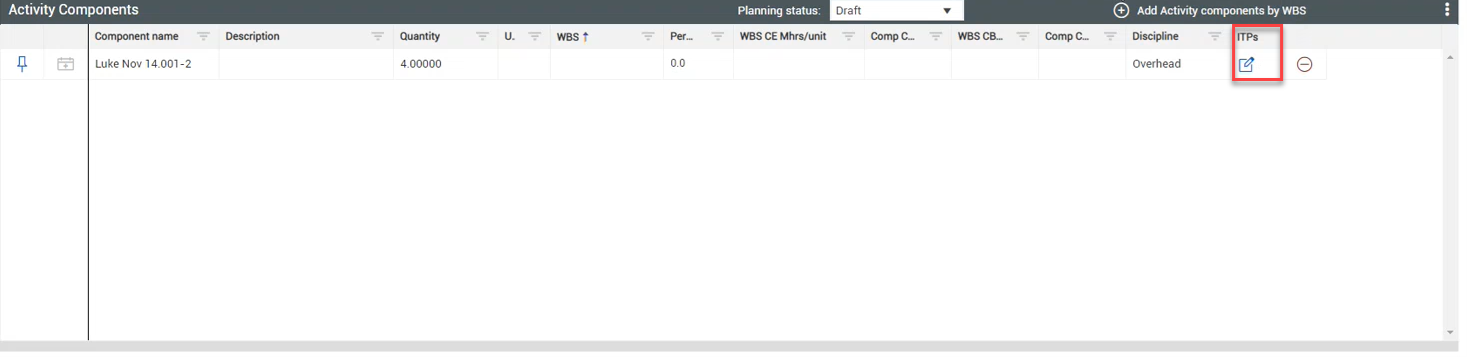
The activity components can be managed in both the Quantity Tracking and Work Packaging modules. To link the components, click the Edit icon in the ITP’s column.
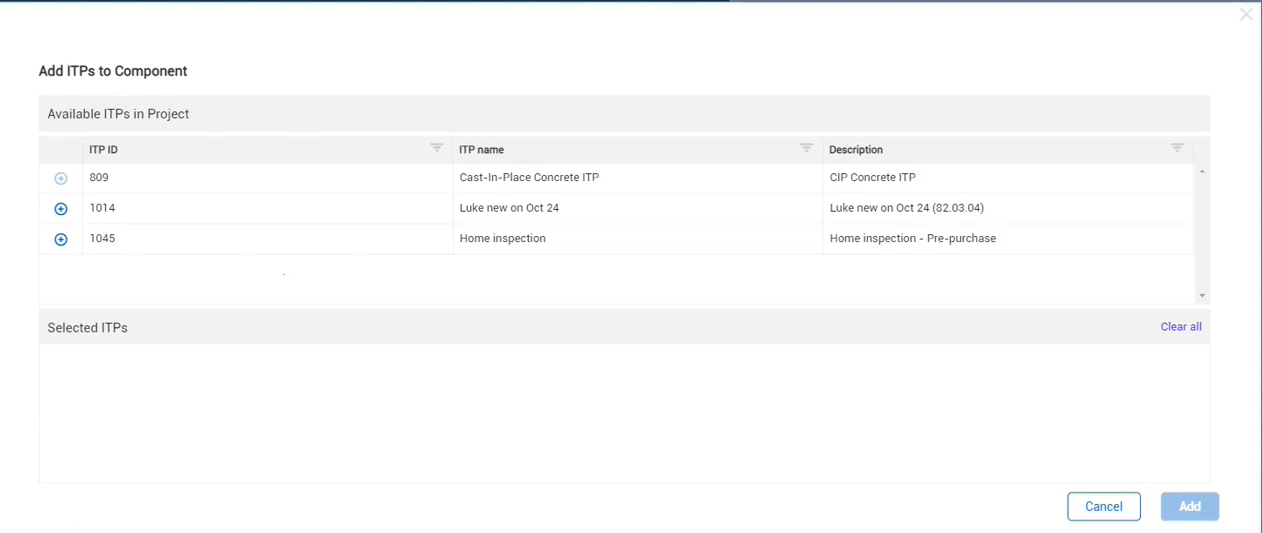
Select the Add icon to show all available and approved ITPs.
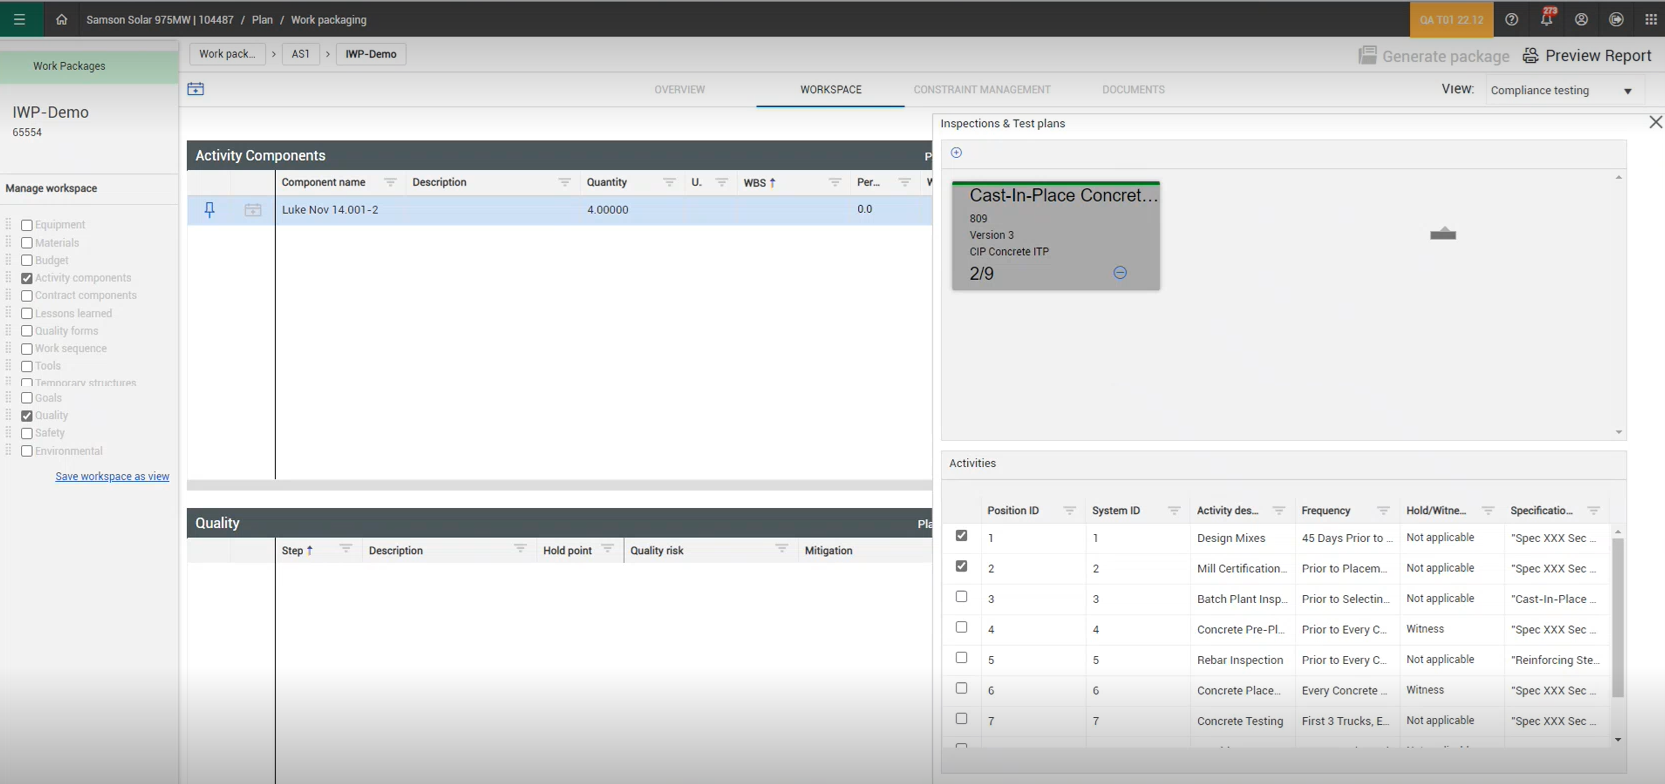
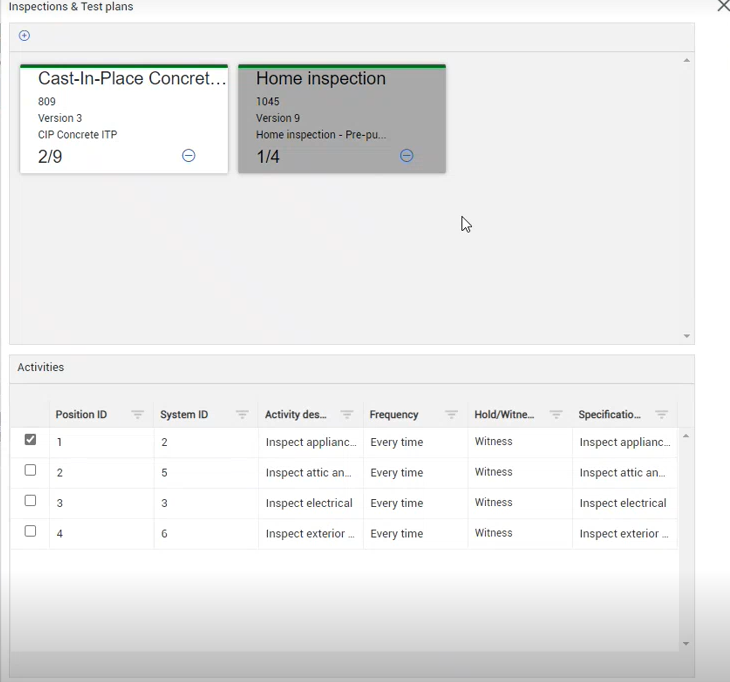
To add ITPs to Components, click the Add icon next to the available ITP. When an approved ITP is selected and added, it brings it to the component where you can mark the activities as complete. The data integrates with InEight Compliance, so you can schedule and manage the inspections.
You can select multiple records with linked project values, so you can see all available data points. This selects all the eligible data from an IWP that can be used in an InEight Progress daily plan.
To create a daily plan with all linked projects values, select a work package, and then go to the Workspace tab. Click the Create daily plan with all available data icon, and then create a daily plan with all available data.
The eligible data from the IWP shows, and the Create daily plan panel opens on the right side of the page.
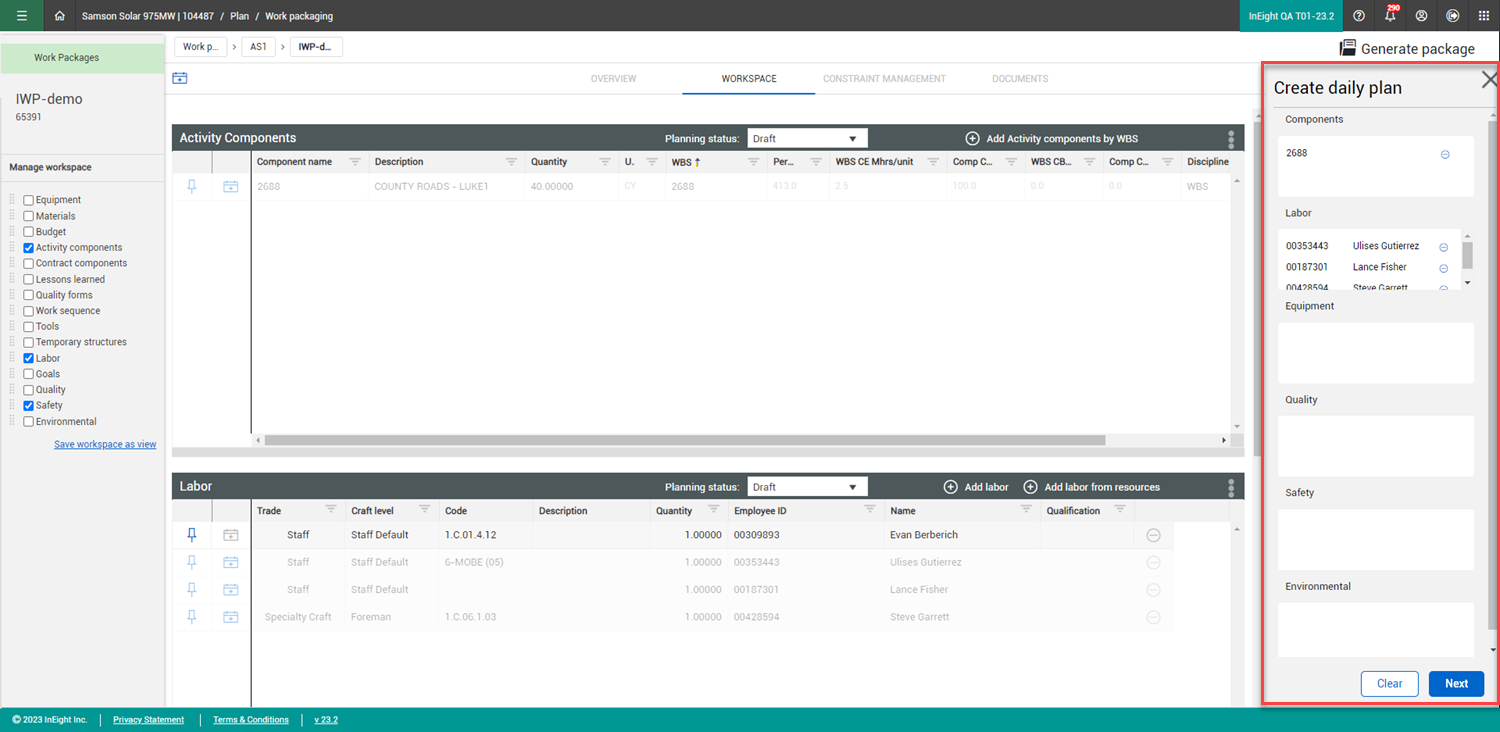
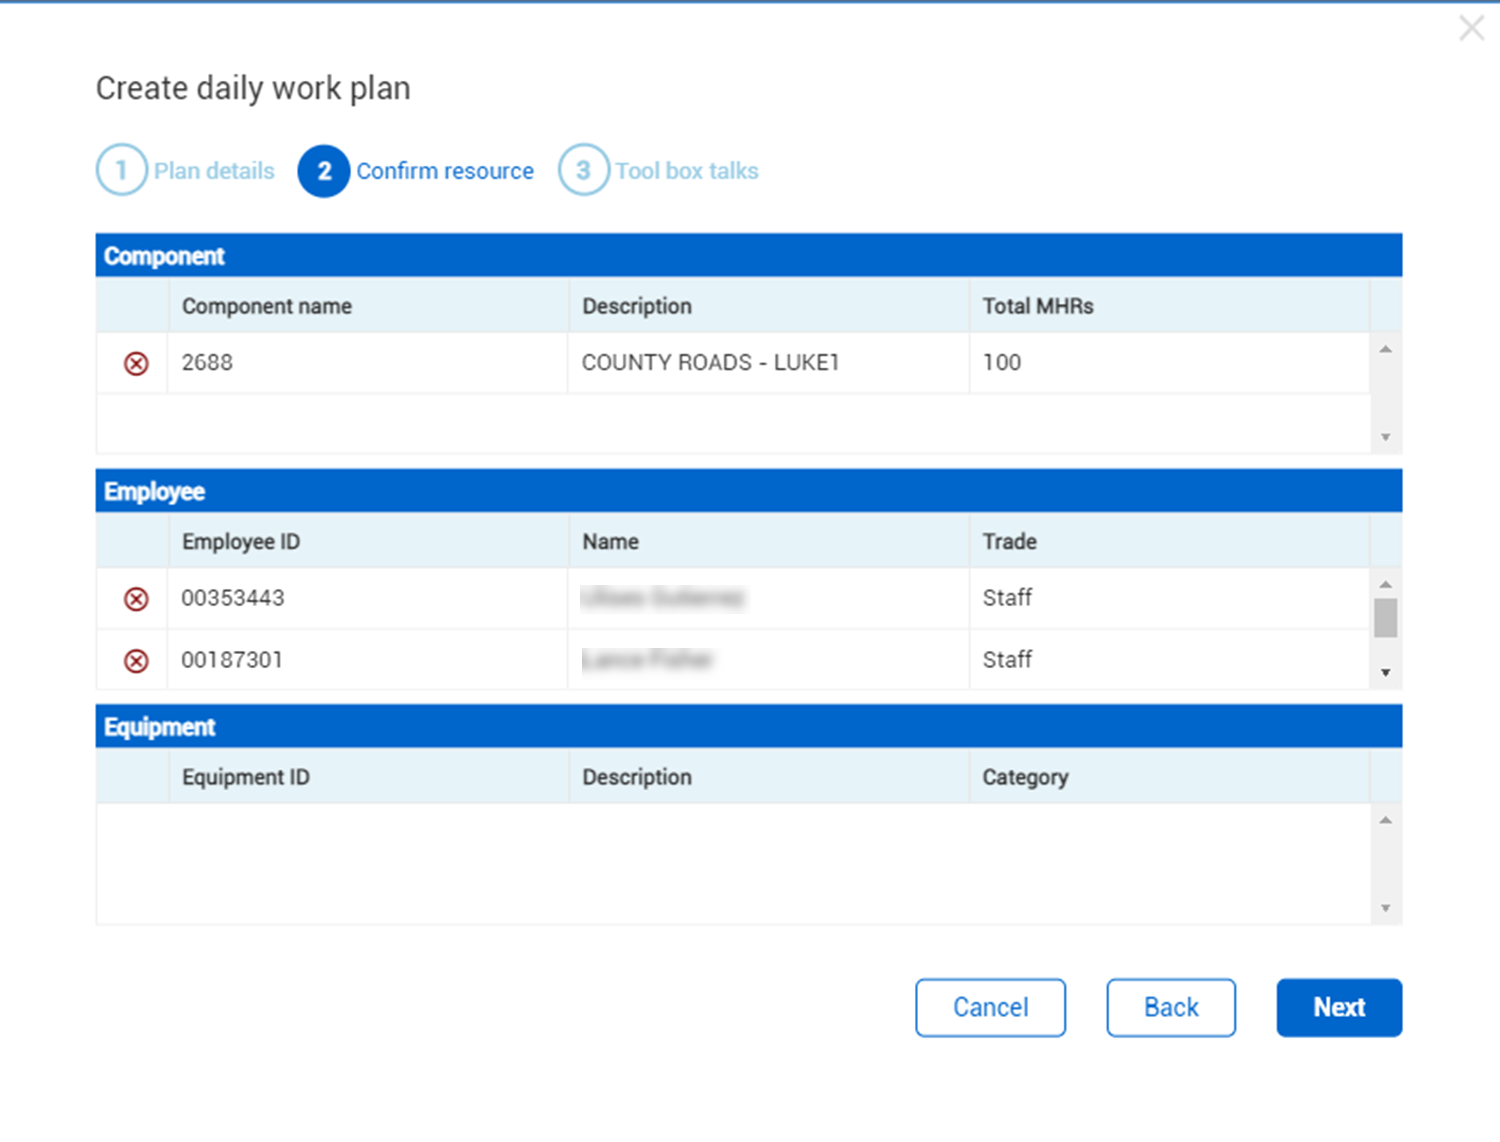
Click Next to start the create a daily plan wizard with all the linked project values.
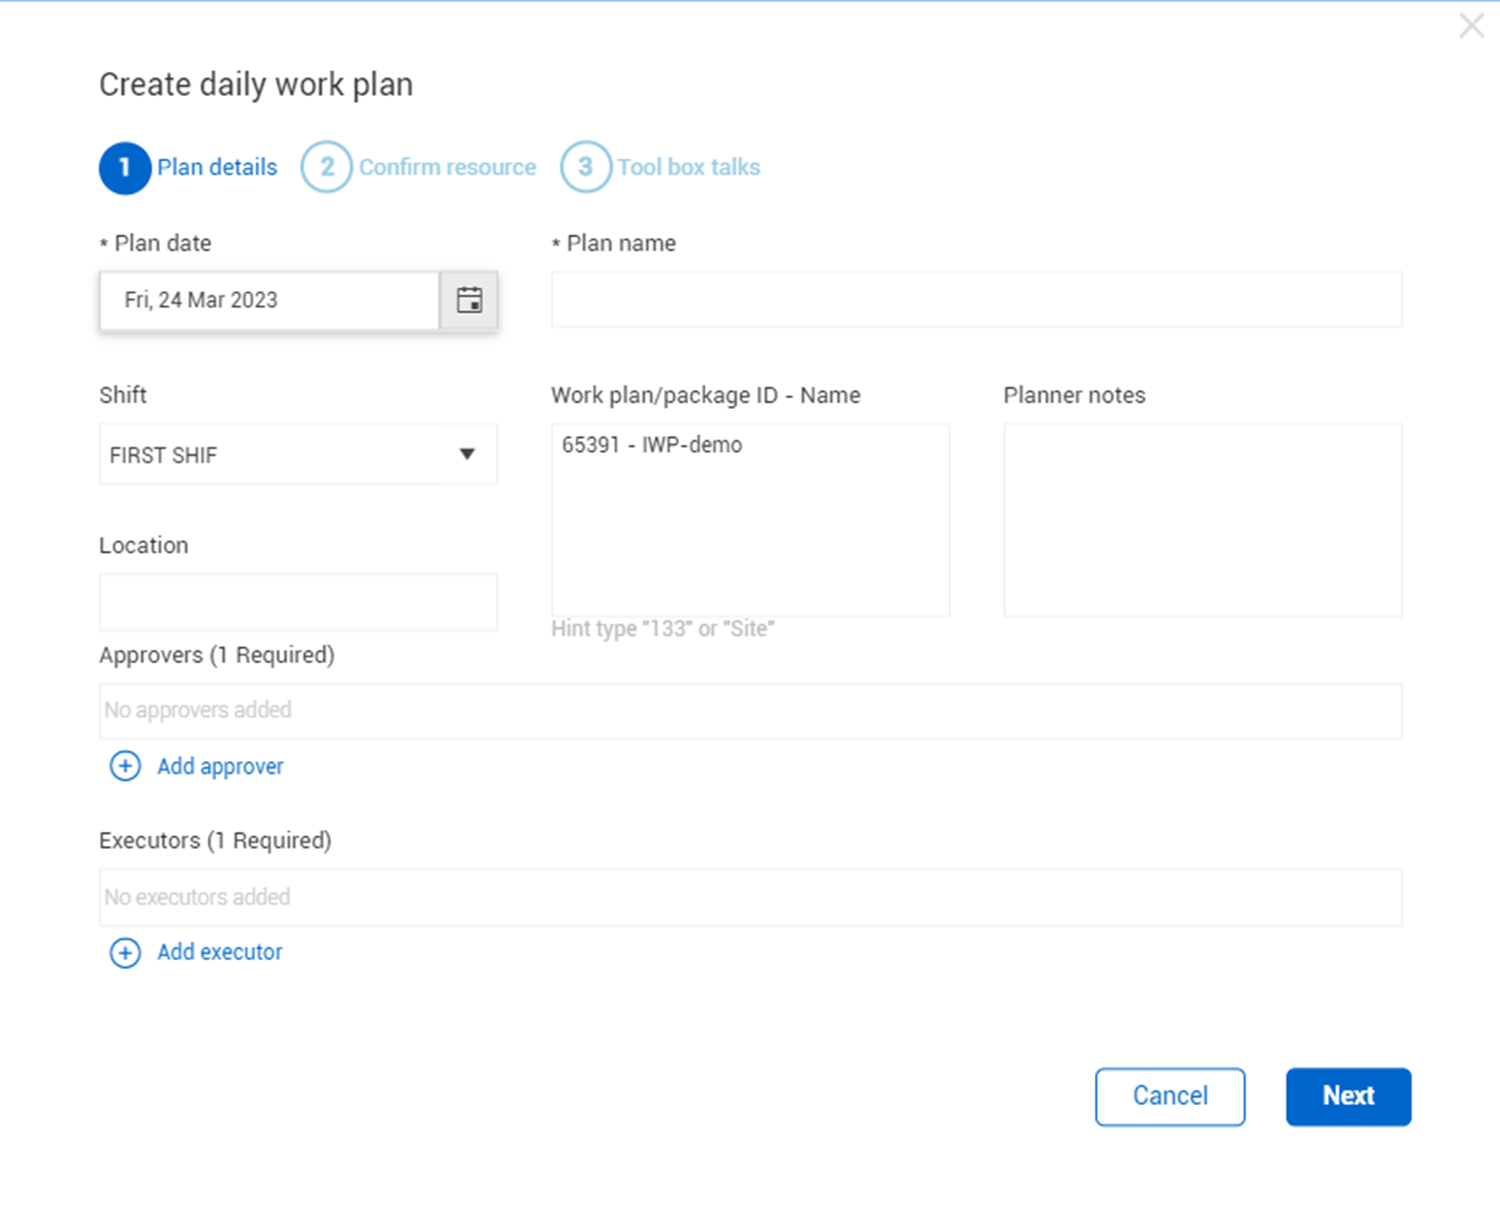
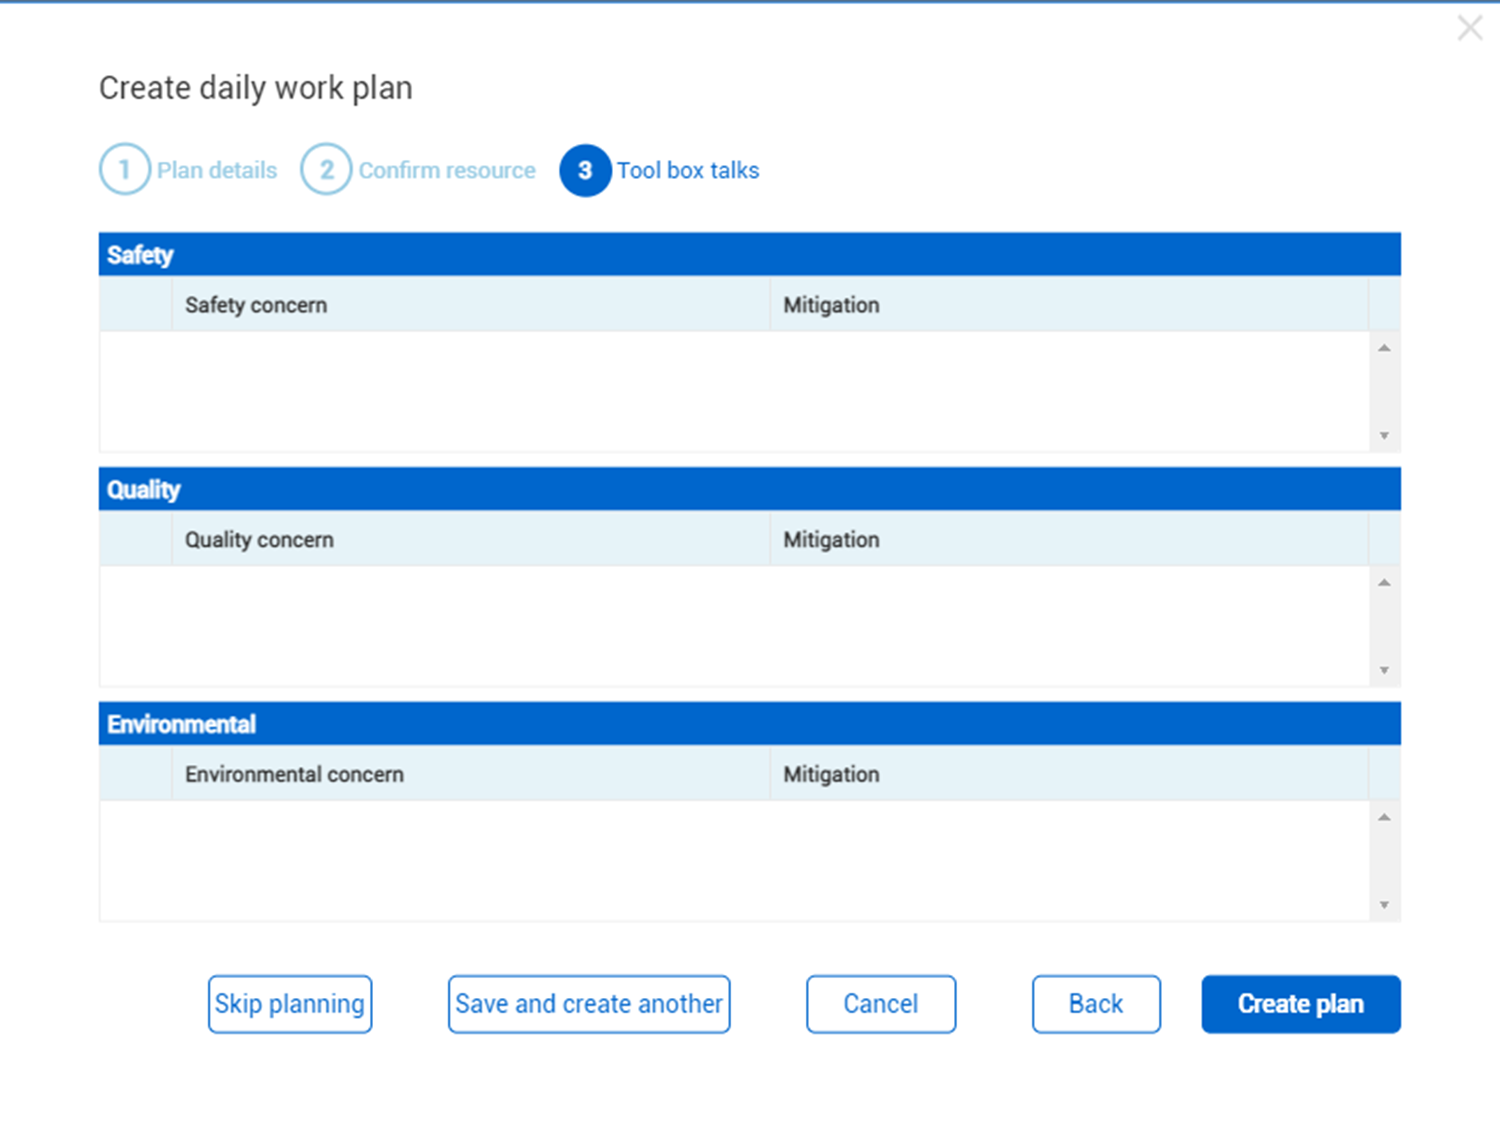
Confirm resources and Tool box talks and then select Create plan.
Additional Information
9977 N 90th Street, Suite 250 Scottsdale, AZ 85258 | 1-800-637-7496
© 2024 InEight, Inc. All Rights Reserved | Privacy Statement | Terms of Service | Cookie Policy | Do not sell/share my information